相关资源
获取一下前端和后端的源码。或者直接下这个比较方便。前端的配置并不复杂,主要是后端要配置的比较多。
配置后端api
后端的api作者是用php写的,所以我们在配置的时候也要选用能支持php的服务器。本文中用的是nginx+php-fpm。
首先要在服务器上安装php和nginx,之后还要启动php-fpm,详细方法可以自行搜索,教程很多。
然后就是关于nginx的配置。
我们需要创建两个配置文件,其中一个用于连接php,另一个用于反向代理和配置ssl。
1
2
3
4
5
6
7
8
9
10
11
12
13
14
15
16
17
18
19
20
21
22
23
24
25
26
27
28
29
30
31
32
33
34
35
36
| server {
listen 56789;
server_name localhost;
root /xxx/xxx;
add_header 'Access-Control-Allow-Origin' '*';
add_header 'Access-Control-Allow-Methods' 'GET, POST, OPTIONS, PUT, DELETE';
add_header 'Access-Control-Allow-Headers' 'Content-Type';
location /live2d_api-master/model {
try_files $uri $uri/ =404;
}
location ~ \.php$ {
fastcgi_pass localhost:9000;
fastcgi_index index.php;
fastcgi_param SCRIPT_FILENAME $document_root$fastcgi_script_name;
fastcgi_param PATH_INFO $fastcgi_path_info;
fastcgi_param PATH_TRANSLATED $document_root$fastcgi_path_info;
include fastcgi_params;
}
location /live2d_api-master/ {
include fastcgi_params;
fastcgi_pass localhost:9000;
fastcgi_index index.php;
fastcgi_param SCRIPT_FILENAME $document_root$fastcgi_script_name;
}
location / {
root /xxx/xxx;
index demo.html;
}
}
|
另一个配置文件。
1
2
3
4
5
6
7
8
9
10
11
12
13
14
15
16
17
18
19
20
21
22
23
24
| server {
listen 80;
server_name live2d.faruzan.cn;
location / {
proxy_pass http://localhost:56789;
}
}
server {
listen 443 ssl;
server_name live2d.example.com;
ssl_certificate /usr/local/nginx/cert/live2d.example.com.pem;
ssl_certificate_key /usr/local/nginx/cert/live2d.example.com.key;
ssl_session_cache shared:SSL:1m;
ssl_session_timeout 5m;
ssl_ciphers HIGH:!aNULL:!MD5;
ssl_prefer_server_ciphers on;
location / {
proxy_pass http://localhost:56789;
}
}
|
后端配置完成以后,再找到前端代码中的assets/waifu-tips.js,在开头或者你认为合适的位置添加一段代码。
1
| const DOMAIN = 'https://live2d.faruzan.cn/live2d_api-master/'
|
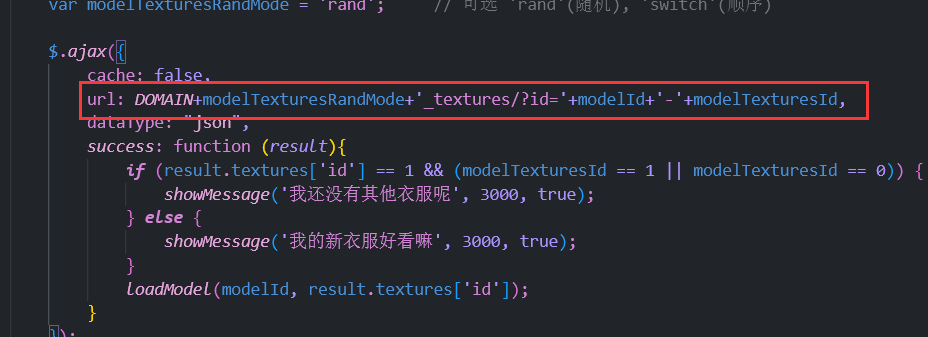
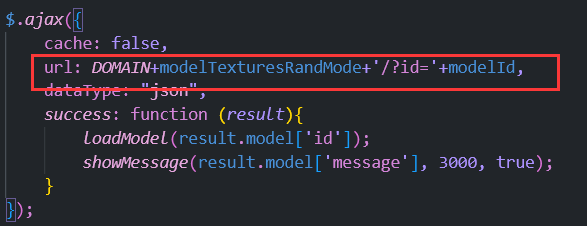
再找到以下三处,修改api的链接。


这样完成了。这个api接口还可以提供给其他网页使用,只要引入前端代码并修改api地址就可以了。
补充
另外,还可以使用php内置服务器直接启动。把前端代码和后端代码放在同一目录,然后:
这个服务器使用起来是很方便,但仅限于测试使用,不建议在正式场合使用。
示例网页。


